Your Cart is Empty
Bestsellers
Shop All
About the Brand
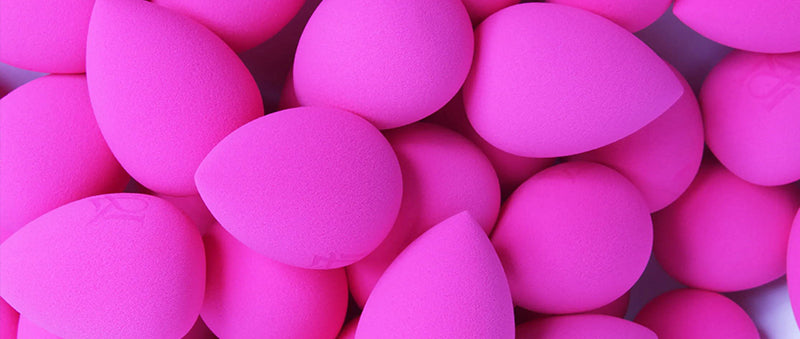
8 Ways to Use Our New Foundation Blender Sponge
October 04, 2020 5 min read
8 Ways to Use Our Foundation Blender Sponge
Any makeup artist will agree that beauty sponges are hands down the most useful and reliable multi-purpose tool you can have. As a seasoned makeup artist, the creator ofJacque Mdigo cosmetics has added the perfect beauty sponge to her lineup of products. Whether you’ve used a sponge before or are a newbie, here are 8 ways to use our new Foundation Blender.
1. Applying Foundation Flawlessly
This is how a beauty sponge is widely used, and for a good reason. Our sponges are specially designed to bounce flawlessly on the skin, giving a perfect airbrush finish to your foundation. The sponge is also made to not to absorb too much product so you’re not wasting it. It evenly distributes the foundation, preventing streaks and uneven coverage.
Pro tip: run your blender under water and then squeeze it out before using it. The damp sponge ensures that the product will get spread evenly and that the sponge will be as bouncy as possible for excellent and easy application.
2. Spot Concealing With Precision
The precision tip on our sponge adds to the versatility of use. It’s a great tool to gently conceal on small spots in hard to reach areas. Use it to gently blend concealer under the eye without fear of creases or getting concealer in your lashes. It’s also excellent to add coverage to difficult areas like the creases of the nostrils. The sponge will help seamlessly blend concealer with your foundation, especially if it’s damp.
3. Define and Contour
A lesser known use for the Foundation Blender Sponge is to apply the perfect contour. The egg shape of the sponge perfectly aligns with the hollows beneath the cheekbones, helping pinpoint the best place to apply contour. When applying contour, you’re walking on a tightrope between subtly sculpting the face to perfection or adding shadows where they don’t belong, which in the worst case can give you a five o’clock shadow. The curve of the sponge will guide you to sculpt your face with both powder or cream contour products. Give the product a few bounces with the sponge to perfectly apply and blend contour into your base.
Pro tip: Always blend upwards when it comes to contour. This allows the contour to lift the face, not drag it down.
4. Get a Natural Glow With Cream Blush
Dewy skin is in right now, which has spurred the release of cream versions of every makeup product under the sun. Cream blush is the perfect product to achieve a healthy, rosy glow. The Foundation Blender Sponge is the perfect tool to apply cream blush flawlessly. Use the wider end of the sponge and pick up a tiny amount of product, then bounce it on the cheekbones and upwards towards the temples to lift the face. Start off with a small amount of product; you can always add more but it’s difficult to take away when overapplied. Always add just a touch of blush to the nose to keep the look natural and cohesive.
5. Apply Powder to Set With a Natural Finish
Many people steer clear of applying setting powder with a sponge for fear of caking on too much. When applied the correct way, a damp beauty sponge can be the best way to apply setting powder to avoid texture and flashback. It’s important to pick up a minimal amount of powder by lightly tapping the sponge in the powder, not pressing. After that, lightly bounce the sponge over the skin to set the makeup. When you’re done, take a big, fluffy brush and dust off any excess. The damp sponge will allow the powder to melt into the base so the skin doesn’t look powdery.
6. Bake Like a Pro
Jacque baking with The Foundation Blender
Baking, a technique created by stage performers, has made it into our Instagram makeup lexicon. It’s a useful method but proceed with caution; baking is best for dramatic or long wear makeup, not as an every day technique. Unlike the regular powder application mentioned above, you want to press the sponge into your loose setting powder and pick up a lot of product and immediately press it into the areas that you want to highlight and set, like your under eyes, nose, chin, and forehead. There will be a visible layer of setting powder sitting on top of your skin. Leave it that way for 5-10 minutes, depending on how intensely you want to set your makeup. Once that time has elapsed, dust off the excess powder with a big, fluffy brush.
Baking is not something to do every day because over time it can dry out your skin, particularly your under eyes. If you’re getting ready for a special night out, it’s a great way to make your makeup bulletproof for the entire evening, even through sweat and rain. The beauty sponge helps press and set the powder to melt it perfectly into your base.
7. Apply the Dewiest Highlight Ever
Another excellent and underrated technique that the Foundation Blender Sponge makes possible is a glossy, healthy glow. A sponge will become your staple for getting the dewiest skin of your life, even dewier than your post hot yoga face. You can use cream or powder products, shimmery or glossy. Start with a damp sponge and lightly tap it into the product. Now, softly bounce the sponge on the high points of your face, like your cheekbones, the bridge of your nose, your cupid’s bow, and even your forehead or chin if you want to be seen from outer space. The sponge makes it possible to control the intensity and location of the highlight with precision.
If you’re having a no makeup day but still want to look glowy, dip a clean and damp blender sponge into a few drops of your favorite face oil and just tap it onto your cheekbones. Instant dewiness applied perfectly is now at your fingertips!
8. Fix Mistakes With Ease
The Foundation Blender Sponge also serves as an excellent magic eraser for mistakes. Did the mascara wand tap your nose and leave a black smudge? Lightly dampen the very tip of your sponge with micellar water or makeup remover and carefully wipe away the spot. Now use the other end of the sponge that you previously applied foundation with to tap the spot to reblend the foundation. Dust a tiny bit of powder and you’re good to go. Use this technique with any type of smudging or fallout to fix the mistake without wrecking your makeup.
The Ultimate Multipurpose Tool
It’s hard to believe that one little sponge can do 8 different tasks with ease. Our new Foundation Blender Sponge will soon be your best friend. Be sure to clean your sponge once a week with diluted dish soap in warm water. Soak the sponge and squeeze it out until the water is clear. With time, you’ll be using your blender sponge for a flawless face every day.
Upcoming Blogs
How to Choose Your
Foundation Shade
Your Foundation Can Look Flawless
Pull off Bold Lip Stain Shades with Confidence
Leave a comment
Comments will be approved before showing up.
Subscribe
Sign up to get the latest on sales, new releases and more …


